Taking GKE Autopilot and Cloud Deploy for a spin
Cloud Deploy and GKE Autopilot are two relatively new releases from GCP in the DevOps space, tackling two different, but related problems. Both seek to make it easier to get your code running in cloud

Cloud Deploy and GKE Autopilot are two relatively new releases from GCP in the DevOps space, tackling two different, but related problems. Both seek to make it easier to get your code running in the cloud and take away much of the complexity of doing it by hand using a bunch of known and well-trodden experiences by many to create a solution which is a starting point that can easily be adopted into something more complex should your workloads require it.
What are Autopilot and Cloud Deploy?
Autopilot is a mode of operation of GKE (Google Kubernetes Engine), Googles managed version of Kubernetes, which enable teams to deploy workloads onto the cloud, and have Google manage the complex parts of running a Kubernetes cluster for you. Problems like right-sizing your nodes, patching, availability etc, which are things that operators of clusters have to handle are taken away from the user. You don’t actually have access to the underlying nodes in Autopilot, unlike regular GKE. However at the same time, the pricing model changes too. In raw numbers, it is cheaper to run the nodes yourself, and run your apps on those nodes. However you’ll have to make sure you have the right capacity and unused compute in your node will be charged for, and you’ll need to do the maintenance yourself. With Autopilot, you simply pay for the resources you’re consuming by the pod and that’s it. You can read more about Autopilot from Google here.
Cloud Deploy is Google’s managed CD (continuous delivery) pipeline offering that was made generally available earlier this year. You get one per billing account as part of the free tier, then it’s $15/pipeline. It offers a bunch of features of which my personal favourite is the delivery metrics which give you insight into what I presume is an idea that came out of the DORA state of devops key performance metrics, which includes deployment frequency and deployment success rates. There are a whole heap of features which I’m not going to dive into in this blog post, but would encourage you to check them out here. I will add that at this time, cloud deploy only supports GKE clusters so you’ll need to be using one in order to take advantage of this product.
Deploying a GKE Autopilot cluster
I was going to write a whole thing here about how to do it and get started, as well as some tips, but honestly it’s so dang straightforward, that rather than regurgitate the docs, I’ll just say take one of the quick starts in the docs or even in the console directly.
Something worth pointing out is that by default you get a pod provisioned with 500mCPU and 2gb ram which may or may not be too much (or not enough!) for your needs, so once deployed, consider how much capacity you need to allocate to your application on a per-pod basis. If you don’t specify values, then the defaults are used. Take a look at the allowable resource ranges to work out a value that’s suitable.
Deploying a pipeline
Before you can make use of the pipeline you’ll need to have a cluster up and running to target your deployments to. If you have multiple environments, you can target as many as you need as you can add more stages to the pipeline to deploy to as targets. At the time of writing, the only way to deploy a pipeline is via the CLI as there isn’t a wizard (yet!) on screen to help you out.
Worth noting, whilst the Cloud Deploy service can target a cluster that’s running in any of the regions where GKE is available, at the time of writing, you can only deploy a pipeline to select regions, and the two Australian regions are not yet available for use. Under the hood, however, Cloud Deploy is orchestrating a number of Cloud Build jobs so it should be possible to choose a worker pool for your build job to run if you need all the compute to remain in a particular region.
To start, you’ll need a few files, which you can use to tell Cloud Deploy how to run your pipeline. The first is a skaffold file which tells Cloud Deploy how to deploy your application to the cluster. If you don’t have one already you can generate one here with skaffold init. For context and by way of example, mine looks like this:
apiVersion: skaffold/v2beta16
kind: Config
deploy:
  kubectl:
    manifests:
      - k8s-*
The next step of the process is to create the pipeline with a clouddeploy.yaml file. You can read the full convention of the structure of the YAML file here if you need a reference.
In my example, I’m just targeting a single cluster, but you can add more steps, and by extension, more clusters to the process if you need. For example if you have dev, test, staging, prod, etc. My preferred choice is to have two envs. Dev and Prod, but this is the step to make any personal or organisational choices here.
Here’s my one-cluster example of a clouddeploy.yaml.
apiVersion: deploy.cloud.google.com/v1
kind: DeliveryPipeline
metadata:
  name: my-demo-app-1
description: main application pipeline
serialPipeline:
  stages:
    - targetId: autopilot-cluster-1
      profiles: []
---
apiVersion: deploy.cloud.google.com/v1
kind: Target
metadata:
  name: autopilot-cluster-1
description: development cluster
gke:
  cluster: projects/<PROJECT_ID>/locations/australia-southeast2/clusters/autopilot-cluster-1
In this sample yaml file, you can see that I’ve set the target of the development cluster to be autopilot-cluster-1, and then on the gke key, you can see I’ve set the cluster value which is the way the pipeline will find the cluster to apply the changes to. In my case, I set the pipeline to target a cluster running in the new GCP region in Melbourne.
In the image above you can see the first command on the cli is to create the pipeline, with the subsequent command to create a release. A release is a central to a pipeline lifecycle. I’d recommend having a quick look at this page on the docs, which explains how a release works by connecting everything together in your pipeline.
Once a release is created, your pipeline will kick off and start the deploy process. In my example I didn’t include any stage gates, as I don’t personally believe that human intervention in an automatic continuous delivery pipeline is a good thing. The support is there for them, however, so if your CD pipeline requires manual approval you can add it in.
Metrics
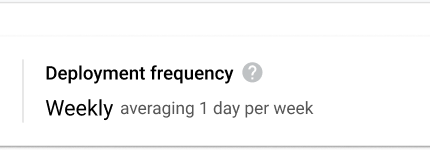
The last point I want to make is on the topic of metrics, which come out of the box with the Cloud Deploy service. As is talked about in the docs, the rates of deployment success, frequency and others are provided with no extra config. They’re measured on a 30 day rolling period and will give you and your team some insight in the posture of your engineering capability to meet the DORA metrics. Worth noting, the metrics are measured against your production target, or, the last step in your pipeline which Cloud Deploy considers to be the production target. Neat!
Summary
I hope this post has given you an insight and garnered some interest in using the Cloud Deploy service. Would love to hear your thoughts on how you’re using or how you think it could benefit you and your team moving forward.


